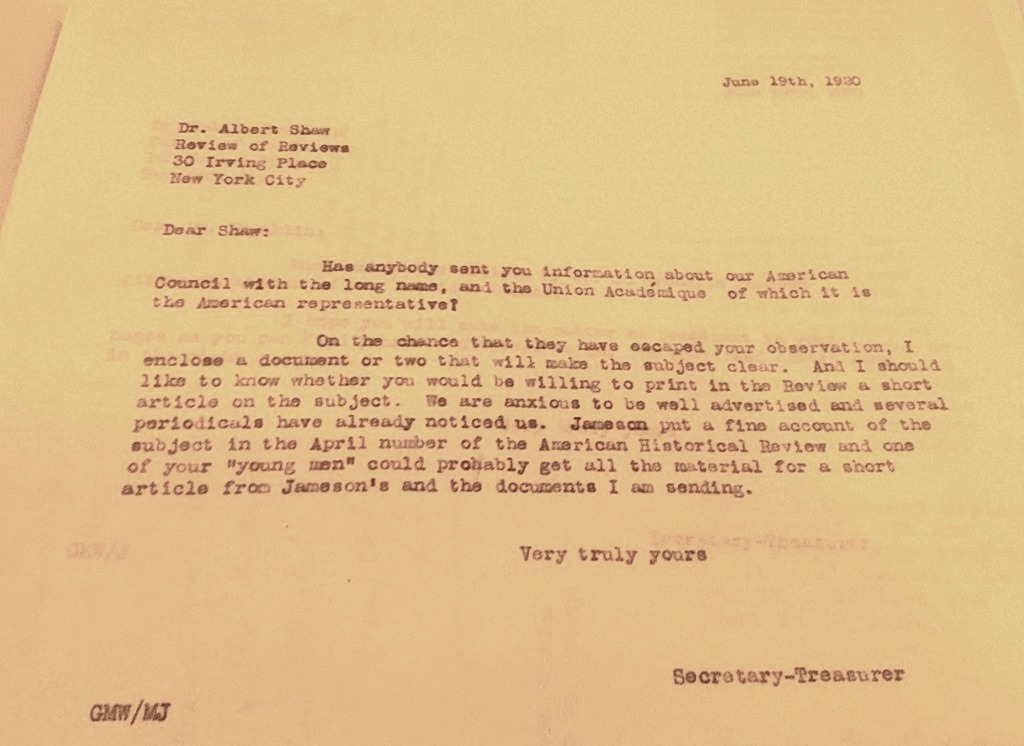
Good news: The first major part of this project is finished! The finding aid is complete for Parts I and II, and has been sent on to my Library of Congress supervisor for preliminary editing. The work involved in editing and standardizing and re-editing and re-standardizing the finding aid took me more time than anticipated, but I have now moved on to the processing work for Part III. Over the next couple of weeks, I will be posting about some of the things I’ve been doing to intellectually process the collection over the past months. Because I’m physically working with materials again, I will also be returning to regularly scheduled Monday Marvels posts.
As you might already know, when this project is complete, the finding aid for the ACLS collection will consist of three parts:
- An Excel spreadsheet with the container lists for Parts II and III, which will be available for research use in the reading room
- A WordPerfect word document with pertinent information for Parts I, II, and III, including a title page, collection summary, table of contents, administrative information, organizational history, scope and content note, description of series, container list, and appendices
- A version of the completed finding aid in Encoded Archival Description (EAD), which will allow users to easily search through it on the Library of Congress website
Because I am initially creating the container lists for Parts II and III in Excel, I had to figure out an easy way to transfer that information into WordPerfect. I thought this would be an excellent opportunity to share some tips on how to do this with all of you (I’ll include information on how to convert to Microsoft Word, as well), since other people out there might also be doing this as part of a large project. Side note: If you’re interested in converting a finding aid straight from a spreadsheet to EAD, you might want to look at this tutorial by Maureen Callahan.
At this point, you may be wondering why I didn’t build the container list in a spreadsheet and a word document at the same time. There are two major reasons for this. First, I didn’t want to have to type everything twice or copy and paste everything individually, both of which would’ve taken up a lot of extra time. Second, I was able to easily re-order the spreadsheet after completing it, which allowed me to put it into the exact order it needed to be in for the word document. If I had built the container list in WordPerfect as I was building it in Excel, I would’ve had to rearrange both, which would have taken an enormous amount of time.
But how to get the information from Excel to WordPerfect without it looking like a huge mess?
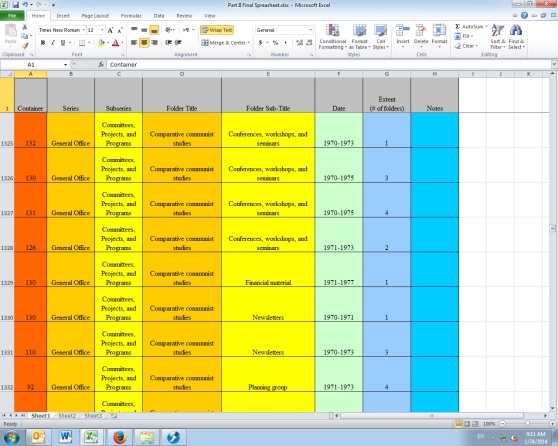
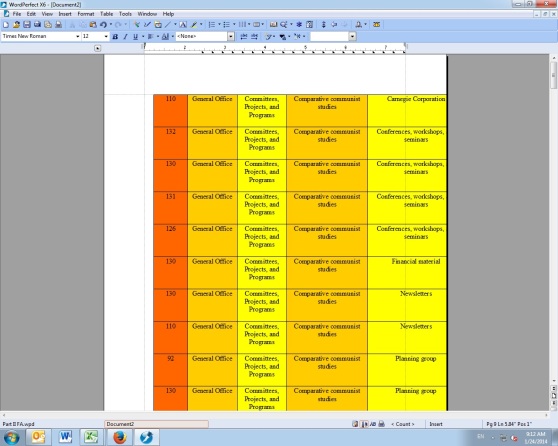
1. Here is a screen shot of the Excel spreadsheet for Part II. I’ve used bright colors for the columns because it’s easier for me personally to deal with the information when there is color differentiation involved, and because having a screen full of bright colors is more fun than having one that is just black and white (Caroline, my predecessor, had originally set up the spreadsheet with colors and I thought it was a great idea!).
2. This is what it looks like when I copy and paste the Excel spreadsheet into WordPerfect:
Clearly this won’t do! Many of the columns are missing, it’s in portrait instead of landscape mode, and it’s just a different format overall. So how do I change this to look like a normal word document?
3. One of the great things about WordPerfect is that you can look at the codes going into the formatting, so if something is frustrating you, you can see exactly what is happening and change it right in the code. This isn’t a possibility with Microsoft Word, sadly. To see the codes in WordPerfect, click on View -> Reveal Codes.

4. Here is what it looks like when the codes are revealed:
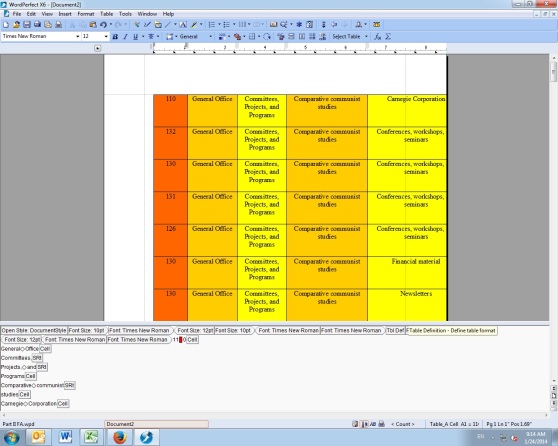
You can see them down on the bottom of the screen – it shows information about the font, the style, and all other aspects of the formatting involved in a word document. Now you want to go into the code and delete the table while keeping the information in it. To do this, I first clicked on the upper left hand corner of the table, and then clicked on the “Tbl Def” (define table format) button in the code and hit the delete key on my keyboard.
5. This brought up some options – I could either delete the entire table, just the contents of the table, just the formulas, or convert the table to another format. I wanted the last option, highlighted here:

6. The easiest way for me to reformat the text in the way that I wanted was to convert the table to text with the different cells separated by tabs. Some of you might find it easier to separate the text in other ways, but I found that separating it with tabs allowed me to see where the separations were very easily and also allowed me to reformat it into a usable container list without too much effort.

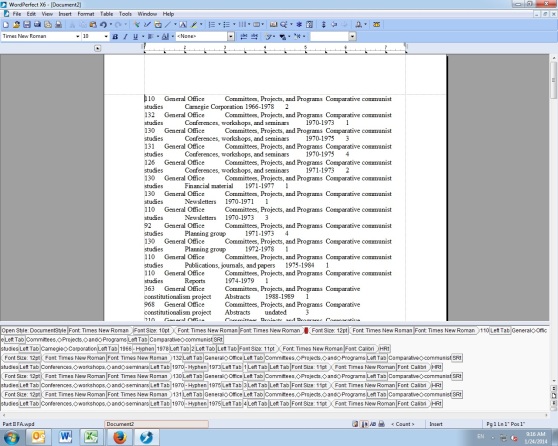
7. Here is what it looks like after deleting the table structure and separating the cells with tabs – still pretty messy, but much better — at least all of the information is present!
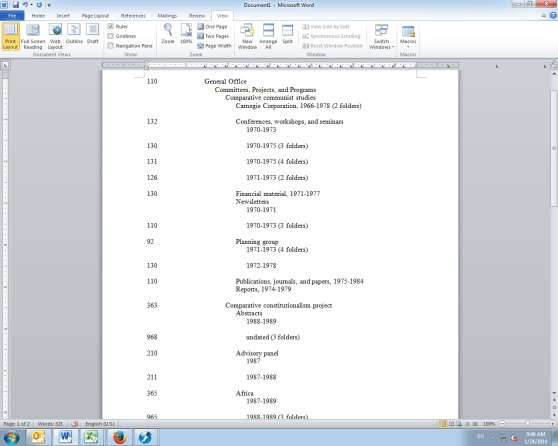
8. All that’s left to do at this point is some manual reformatting of the text. This means going through and deleting the tabs, hitting enter whenever a new line has to start, making sure everything is nested correctly, deleting extraneous headings and container numbers, and reformatting in other fairly simple ways. It did take some time, but wasn’t nearly as bad as it could’ve been! Going through the entire container list manually also allowed me to catch mistakes and correct them, see what kinds of terminology I should be changing to make it more user-friendly, and get a better idea of the collection overall. Here’s what it looks like now, as a finished finding aid in WordPerfect format:

Beautiful, right? Much better than the original spreadsheet copied and pasted!
Here’s how to do the same thing in Microsoft Word 2007 or 2010 (it’s very similar):
First, click on the table. Then, go to the Layout tab and find the “Convert to Text” button (highlighted here):

At this point, you basically get the same message as you do in WordPerfect – the program asks how you want to separate the text:

Finally, this is how it looks after reformatting everything, as displayed in Step 8 above:
Pretty simple, all things considered.
Stay tuned for more updates about the intellectual processing of the ACLS records!